第13次课 · 第6章 · 3课时
综合项目——点餐系统(上)
1
教学目标
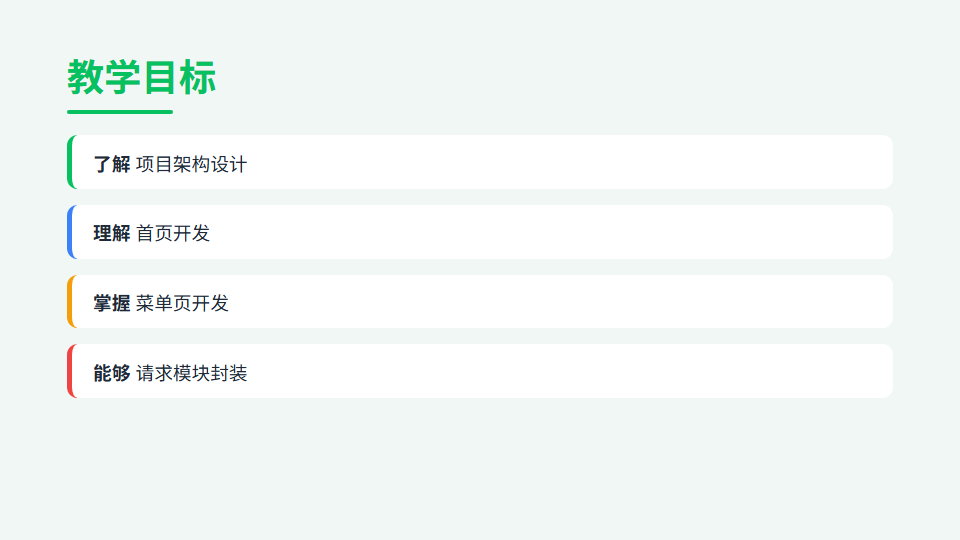
- 掌握小程序项目的架构设计方法
- 理解组件化开发的思路
- 能够完成点餐系统首页与菜单页
- 案例:案例6 点餐系统(上)
2
重点、难点与课时分配
教学重点
项目架构设计、首页与菜单页开发
教学难点
项目架构规划、组件拆分
课时分配(共 3 学时)
项目架构设计讲解 1 学时,点餐系统上半部分实操 2 学时
3
课件要点
项目架构设计
页面规划: 首页/菜单/购物车/订单/我的
目录结构: pages/ components/ utils/ api/ images/
请求封装: utils/request.js 统一管理
数据管理: 全局状态 vs 页面状态
组件拆分: 菜品卡片/购物车栏/分类导航
首页开发
顶部轮播图: swiper组件实现广告位
搜索框: input + 搜索按钮
分类导航: 横向滚动的分类图标
推荐菜品: 瀑布流/列表布局
底部tabBar: 首页/菜单/订单/我的
菜单页开发
左侧分类列表: 纵向滚动分类
右侧菜品列表: 根据分类动态加载
菜品卡片: 图片+名称+价格+加购按钮
分类切换: 点击左侧分类, 右侧滚动到对应位置
滚动联动: 右侧滚动时, 左侧分类高亮跟随
请求模块封装
baseURL配置: 统一接口前缀
请求拦截: 添加token等认证信息
响应拦截: 统一错误处理
API模块化: 按功能拆分(home/menu/order)
async/await: 简化异步调用
4
代码示例与讲解
项目架构设计
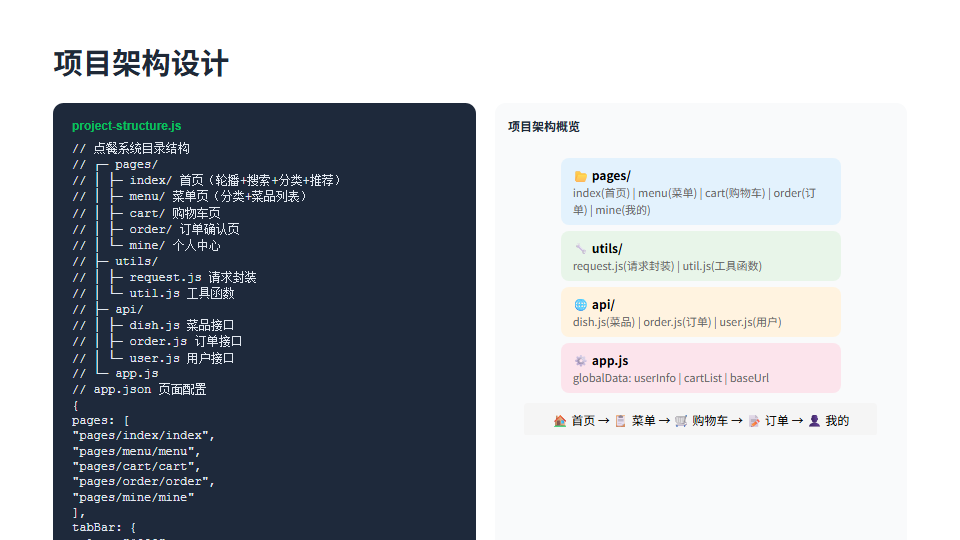
project-structure.js
项目架构概览
1// 点餐系统目录结构
2// ┌─ pages/
3// │ ├─ index/ 首页(轮播+搜索+分类+推荐)
4// │ ├─ menu/ 菜单页(分类+菜品列表)
5// │ ├─ cart/ 购物车页
6// │ ├─ order/ 订单确认页
7// │ └─ mine/ 个人中心
8// ├─ utils/
9// │ ├─ request.js 请求封装
10// │ └─ util.js 工具函数
11// ├─ api/
12// │ ├─ dish.js 菜品接口
13// │ ├─ order.js 订单接口
14// │ └─ user.js 用户接口
15// └─ app.js
16
17// app.json 页面配置
18{
19 pages: [
20 "pages/index/index",
21 "pages/menu/menu",
22 "pages/cart/cart",
23 "pages/order/order",
24 "pages/mine/mine"
25 ],
26 tabBar: {
27 color: "#999",
28 selectedColor: "#07c160",
29 list: [
30 { pagePath: "pages/index/index", text: "首页", iconPath: "icons/home.png" },
31 { pagePath: "pages/menu/menu", text: "菜单", iconPath: "icons/menu.png" },
32 { pagePath: "pages/cart/cart", text: "购物车", iconPath: "icons/cart.png" },
33 { pagePath: "pages/mine/mine", text: "我的", iconPath: "icons/mine.png" }
34 ]
35 }
36}
37
38// app.js 全局数据
39App({
40 globalData: {
41 userInfo: null,
42 cartList: [], // 全局购物车
43 baseUrl: 'https://api.example.com'
44 }
45})
点餐系统项目架构:5个页面——首页展示轮播搜索分类推荐,菜单页左右分类联动,购物车管理商品,订单页确认提交,个人中心管理信息。工具层 utils/request.js 封装网络请求,api/ 目录按模块拆分接口。app.json 配置 tabBar 底部导航4个标签页,app.js 的 globalData 存储全局购物车和用户信息。
首页开发
index-page.wxml
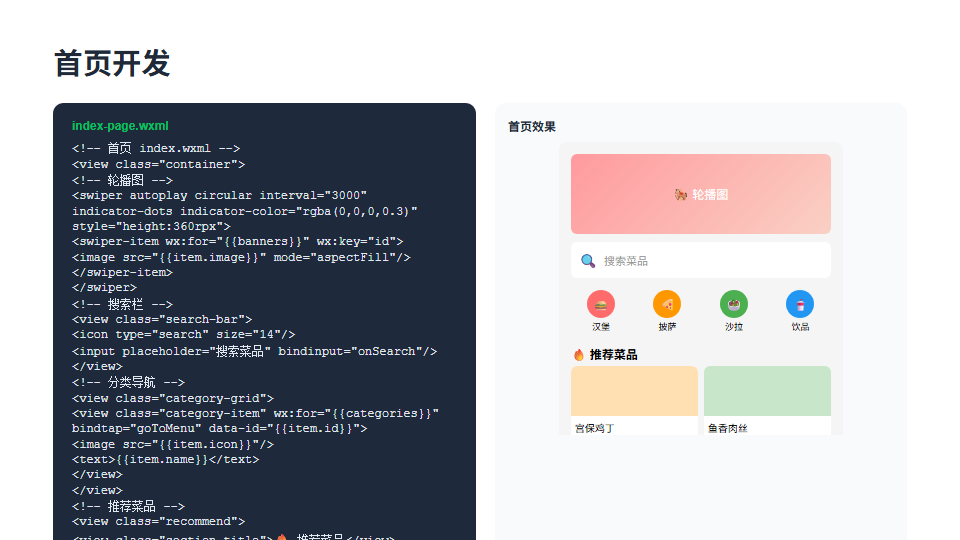
首页效果
1<!-- 首页 index.wxml -->
2<view class="container">
3
4 <!-- 轮播图 -->
5 <swiper autoplay circular interval="3000"
6 indicator-dots indicator-color="rgba(0,0,0,0.3)"
7 style="height:360rpx">
8 <swiper-item wx:for="{{banners}}" wx:key="id">
9 <image src="{{item.image}}" mode="aspectFill"/>
10 </swiper-item>
11 </swiper>
12
13 <!-- 搜索栏 -->
14 <view class="search-bar">
15 <icon type="search" size="14"/>
16 <input placeholder="搜索菜品" bindinput="onSearch"/>
17 </view>
18
19 <!-- 分类导航 -->
20 <view class="category-grid">
21 <view class="category-item" wx:for="{{categories}}"
22 bindtap="goToMenu" data-id="{{item.id}}">
23 <image src="{{item.icon}}"/>
24 <text>{{item.name}}</text>
25 </view>
26 </view>
27
28 <!-- 推荐菜品 -->
29 <view class="recommend">
30 <view class="section-title">🔥 推荐菜品</view>
31 <view class="dish-grid">
32 <view class="dish-card" wx:for="{{recommendDishes}}"
33 bindtap="goToDetail" data-id="{{item.id}}">
34 <image src="{{item.image}}" mode="aspectFill"/>
35 <text class="dish-name">{{item.name}}</text>
36 <text class="dish-price">¥{{item.price}}</text>
37 </view>
38 </view>
39 </view>
40</view>
41
42// index.js 数据加载
43Page({
44 data: { banners: [], categories: [], recommendDishes: [] },
45
46 onLoad() {
47 this.loadBanners()
48 this.loadCategories()
49 this.loadRecommend()
50 },
51
52 loadBanners() {
53 getBanners().then(res => {
54 this.setData({ banners: res.data })
55 })
56 }
57})
首页由四大模块组成:swiper 轮播图,设置 autoplay 自动播放、circular 循环、indicator-dots 指示点;搜索栏用 input 组件绑定 bindinput 事件;分类导航用 grid 布局展示图标和名称,点击跳转菜单页并传递分类 id;推荐菜品用双列网格展示图片、名称和价格。数据在 onLoad 中并行加载,通过封装的 API 方法获取。
菜单页开发
menu-page.js
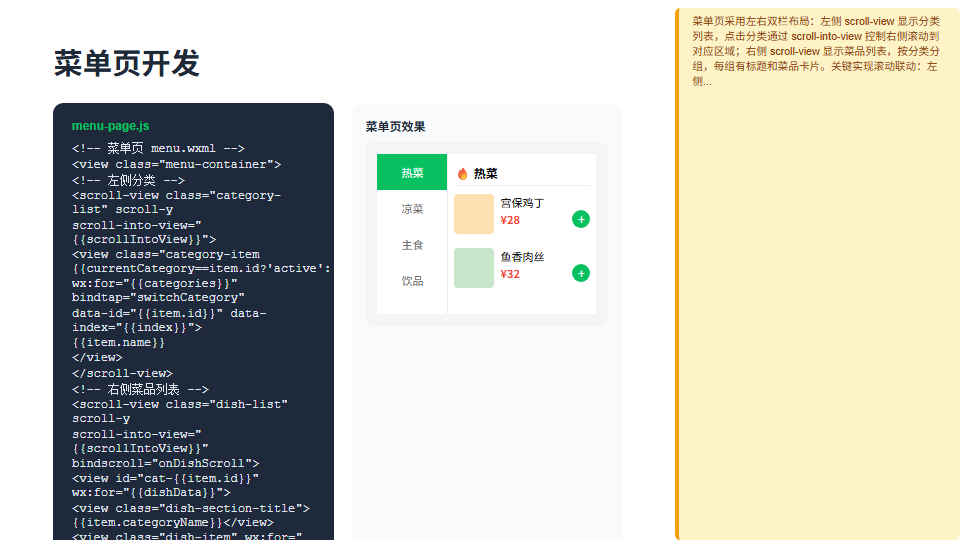
菜单页效果
1<!-- 菜单页 menu.wxml -->
2<view class="menu-container">
3 <!-- 左侧分类 -->
4 <scroll-view class="category-list" scroll-y
5 scroll-into-view="{{scrollIntoView}}">
6 <view class="category-item {{currentCategory==item.id?'active':''}}"
7 wx:for="{{categories}}" bindtap="switchCategory"
8 data-id="{{item.id}}" data-index="{{index}}">
9 {{item.name}}
10 </view>
11 </scroll-view>
12
13 <!-- 右侧菜品列表 -->
14 <scroll-view class="dish-list" scroll-y
15 scroll-into-view="{{scrollIntoView}}"
16 bindscroll="onDishScroll">
17 <view id="cat-{{item.id}}" wx:for="{{dishData}}">
18 <view class="dish-section-title">{{item.categoryName}}</view>
19 <view class="dish-item" wx:for="{{item.dishes}}" wx:for-item="dish">
20 <image src="{{dish.image}}"/>
21 <view class="dish-info">
22 <text>{{dish.name}}</text>
23 <text class="price">¥{{dish.price}}</text>
24 <view class="add-btn" bindtap="addToCart" data-dish="{{dish}}">+</view>
25 </view>
26 </view>
27 </view>
28 </scroll-view>
29</view>
30
31// menu.js 核心逻辑
32Page({
33 data: { categories: [], dishData: [], currentCategory: 0, scrollIntoView: '' },
34
35 // 切换分类(左侧点击 → 右侧滚动)
36 switchCategory(e) {
37 const id = e.currentTarget.dataset.id
38 this.setData({
39 currentCategory: id,
40 scrollIntoView: `cat-${id}`
41 })
42 },
43
44 // 右侧滚动 → 左侧高亮联动
45 onDishScroll(e) {
46 // 根据滚动位置计算当前可见分类
47 const scrollTop = e.detail.scrollTop
48 // 遍历分类标题位置,找到当前分类
49 for (let i = this.sectionTops.length - 1; i >= 0; i--) {
50 if (scrollTop >= this.sectionTops[i]) {
51 this.setData({ currentCategory: this.data.categories[i].id })
52 break
53 }
54 }
55 }
56})
菜单页采用左右双栏布局:左侧 scroll-view 显示分类列表,点击分类通过 scroll-into-view 控制右侧滚动到对应区域;右侧 scroll-view 显示菜品列表,按分类分组,每组有标题和菜品卡片。关键实现滚动联动:左侧点击设置 scrollIntoView 驱动右侧滚动,右侧滚动时通过 bindscroll 事件获取 scrollTop,遍历分类位置数组反推当前分类并高亮左侧。
请求模块封装
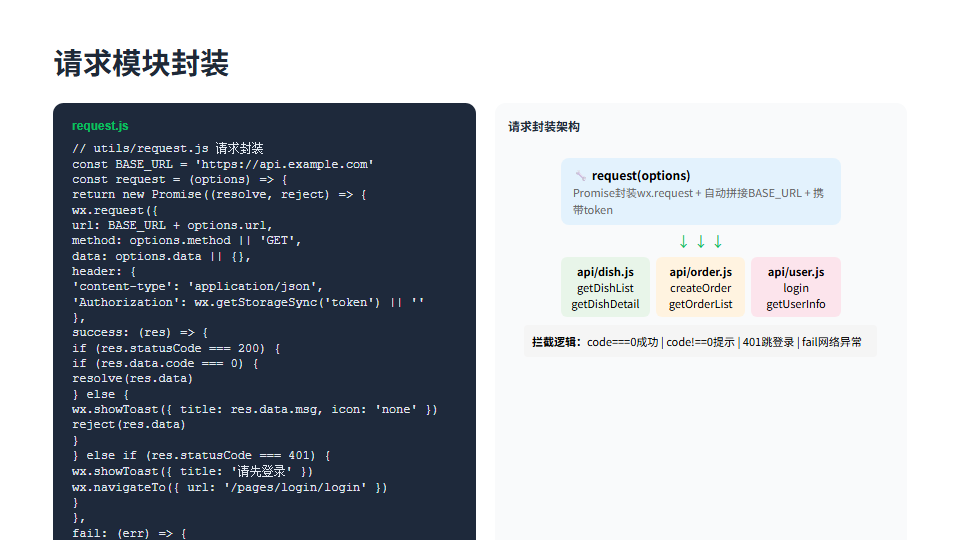
request.js
请求封装架构
1// utils/request.js 请求封装
2const BASE_URL = 'https://api.example.com'
3
4const request = (options) => {
5 return new Promise((resolve, reject) => {
6 wx.request({
7 url: BASE_URL + options.url,
8 method: options.method || 'GET',
9 data: options.data || {},
10 header: {
11 'content-type': 'application/json',
12 'Authorization': wx.getStorageSync('token') || ''
13 },
14 success: (res) => {
15 if (res.statusCode === 200) {
16 if (res.data.code === 0) {
17 resolve(res.data)
18 } else {
19 wx.showToast({ title: res.data.msg, icon: 'none' })
20 reject(res.data)
21 }
22 } else if (res.statusCode === 401) {
23 wx.showToast({ title: '请先登录' })
24 wx.navigateTo({ url: '/pages/login/login' })
25 }
26 },
27 fail: (err) => {
28 wx.showToast({ title: '网络异常', icon: 'none' })
29 reject(err)
30 }
31 })
32 })
33}
34
35// api/dish.js 菜品接口
36import { request } from '../utils/request'
37
38export const getDishList = (categoryId) =>
39 request({ url: '/dish/list', data: { categoryId } })
40
41export const getDishDetail = (id) =>
42 request({ url: `/dish/detail/${id}` })
43
44// api/order.js 订单接口
45export const createOrder = (data) =>
46 request({ url: '/order/create', method: 'POST', data })
47
48export const getOrderList = () =>
49 request({ url: '/order/list' })
请求模块封装:request.js 用 Promise 封装 wx.request,自动拼接 BASE_URL,header 中自动携带 token。统一处理响应:code 为 0 表示成功 resolve,非0提示错误信息,401 状态跳转登录页,网络异常统一提示。API 按模块拆分到 api/dish.js、api/order.js、api/user.js,每个方法只需传入 url、method 和 data,调用简洁。

6
课堂视频
第13次课 · 综合项目——点餐系统(上)
本次课教学视频请在课堂现场观看
视频文件较大未随本站发布;如需回看,请向任课教师索取或在课程群下载。
7
教材案例源码
用微信开发者工具「导入项目」打开对应目录即可运行。知识储备是分知识点的最小示例,案例实现/项目实现是完整工程,服务器端是案例配套的后端接口服务。
8
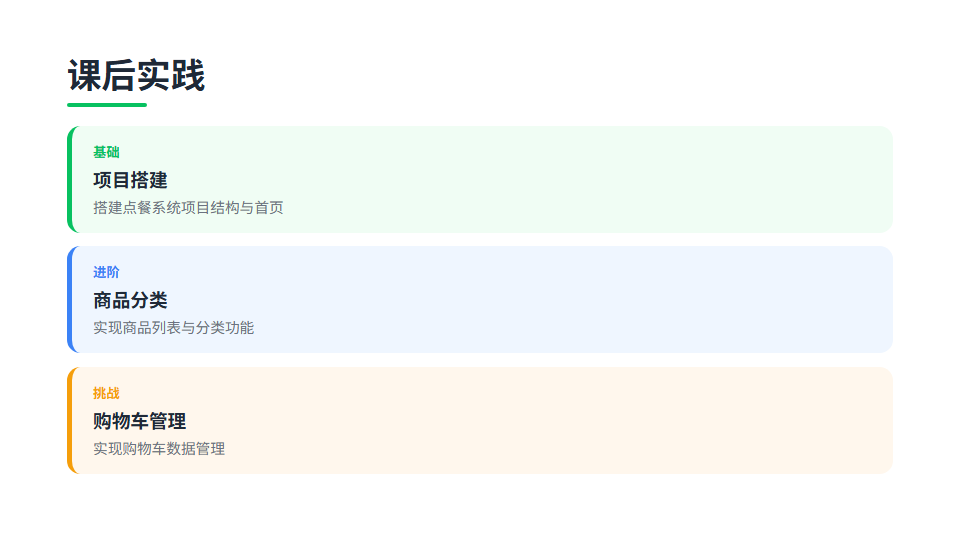
课后实践
基础
搭建项目框架
按照项目目录结构创建点餐系统项目,配置app.json和tabBar
进阶
完成登录与首页
实现登录模块(wx.login + Cookie自动登录)和首页模块(分类切换 + 菜品列表)
挑战
封装请求模块
完善fetch模块,添加请求拦截、错误统一处理、loading状态管理、请求重试机制
9
本课小结
项目架构设计
首页开发
菜单页开发
请求模块封装