第10次课 · 第4章 · 3课时
文件操作与Canvas绘图
1
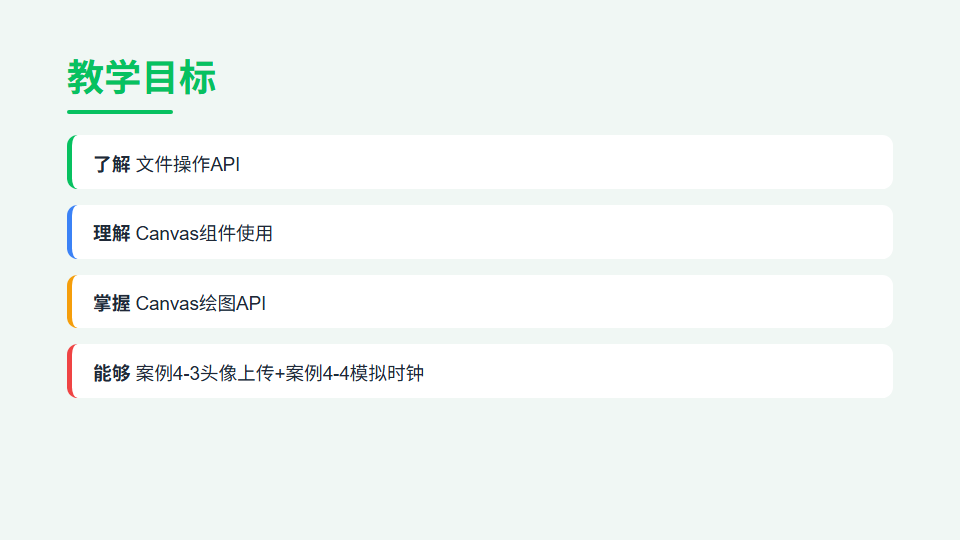
教学目标
- 掌握文件上传与下载API
- 理解Canvas组件的使用方式
- 掌握Canvas 2D绑定的基本绘图
- 能够使用Canvas绘制图形与文字
- 案例:案例4-3 头像上传下载、案例4-4 模拟时钟
2
重点、难点与课时分配
教学重点
文件上传下载、Canvas绑定、绘图API
教学难点
Canvas坐标系、绘图状态管理
课时分配(共 3 学时)
文件与 Canvas 讲解 1 学时,案例 4-3/4-4 实操 2 学时
3
课件要点
文件操作API
wx.chooseMessageFile — 从聊天选择文件
wx.uploadFile — 上传文件到服务器
wx.downloadFile — 下载文件资源
wx.openDocument — 打开文档(pdf/doc/xls等)
wx.getFileInfo / wx.saveFile 文件管理
Canvas组件使用
<canvas type="2d" id="myCanvas"></canvas>
wx.createSelectorQuery().select("#myCanvas").fields()
获取Canvas上下文: const ctx = canvas.getContext("2d")
Canvas坐标系: 左上角为原点(0,0)
注意: Canvas需要在onReady后获取节点
Canvas绘图API
fillRect / strokeRect — 绘制矩形
arc — 绘制圆弧/圆形
fillText / strokeText — 绘制文字
drawImage — 绘制图片
fillStyle / strokeStyle / lineWidth 样式设置
beginPath / closePath / moveTo / lineTo 路径操作
案例4-3 头像上传下载 / 案例4-4 模拟时钟
案例4-3 头像上传下载 — chooseMedia 选图 → uploadFile 上传 → downloadFile 下载回显
案例4-4 模拟时钟 — Canvas 2D 绘制表盘与三根指针,setInterval 每秒重绘
绘制要点:translate 把原点移到圆心,rotate 按角度旋转,每帧先 clearRect 清屏
角度换算:秒针 6°/秒,分针 6°/分,时针 30°/时 再加 0.5°/分
综合运用文件 API 与 Canvas 完成两个教材案例
4
代码示例与讲解
文件操作API
file-api.js
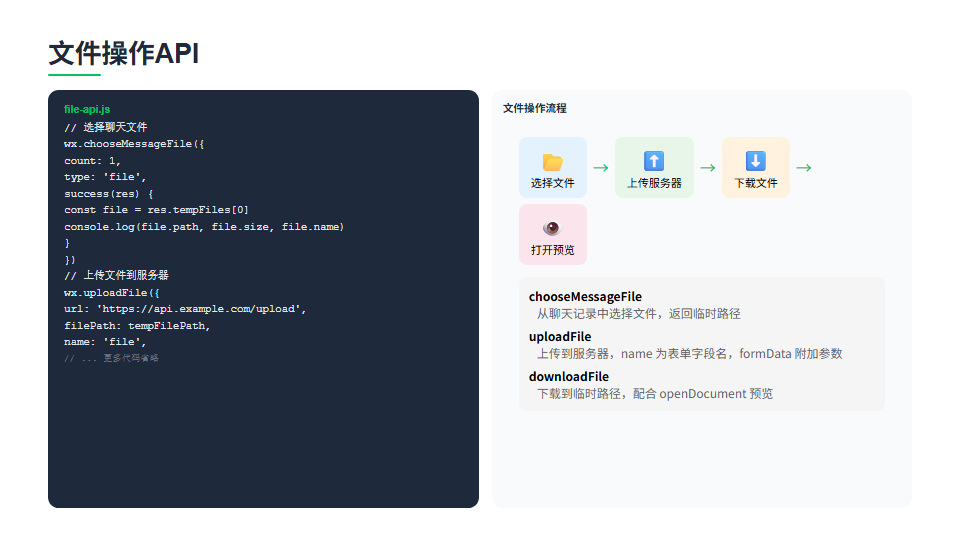
文件操作流程
1// 选择聊天文件
2wx.chooseMessageFile({
3 count: 1,
4 type: 'file',
5 success(res) {
6 const file = res.tempFiles[0]
7 console.log(file.path, file.size, file.name)
8 }
9})
10
11// 上传文件到服务器
12wx.uploadFile({
13 url: 'https://api.example.com/upload',
14 filePath: tempFilePath,
15 name: 'file',
16 formData: {
17 userId: '12345'
18 },
19 success(res) {
20 const data = JSON.parse(res.data)
21 console.log('上传成功', data.url)
22 }
23})
24
25// 下载文件
26wx.downloadFile({
27 url: 'https://example.com/file.pdf',
28 success(res) {
29 const filePath = res.tempFilePath
30 // 打开文档预览
31 wx.openDocument({
32 filePath: filePath,
33 fileType: 'pdf'
34 })
35 }
36})
37
38// ⚠️ 注意事项
39// 1. 上传下载域名需在后台配置
40// 2. 临时文件路径有效期到小程序退出
41// 3. 上传返回的 res.data 是字符串需 JSON.parse
文件操作三大 API:wx.chooseMessageFile 从聊天记录选择文件,返回临时文件路径、大小和名称;wx.uploadFile 将本地文件上传到服务器,url 为上传地址,name 为文件对应的 key,formData 可附加其他参数,注意返回的 res.data 是字符串需要 JSON.parse;wx.downloadFile 下载文件到临时路径,配合 wx.openDocument 预览文档。上传下载的域名都需在后台配置。
Canvas组件使用
canvas-demo.wxml
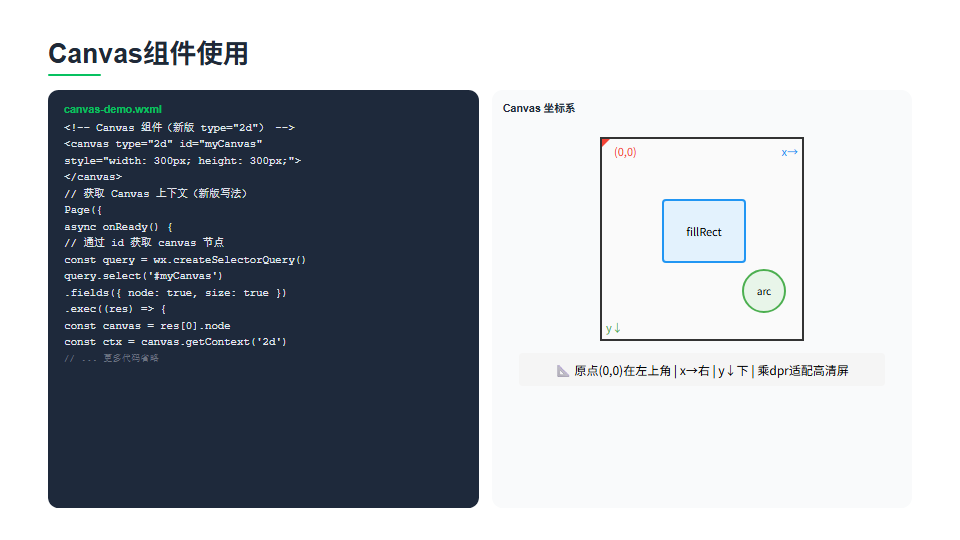
Canvas 坐标系
1<!-- Canvas 组件(新版 type="2d") -->
2<canvas type="2d" id="myCanvas"
3 style="width: 300px; height: 300px;">
4</canvas>
5
6// 获取 Canvas 上下文(新版写法)
7Page({
8 async onReady() {
9 // 通过 id 获取 canvas 节点
10 const query = wx.createSelectorQuery()
11 query.select('#myCanvas')
12 .fields({ node: true, size: true })
13 .exec((res) => {
14 const canvas = res[0].node
15 const ctx = canvas.getContext('2d')
16
17 // 设置画布分辨率(适配高清屏)
18 const dpr = wx.getSystemInfoSync().pixelRatio
19 canvas.width = res[0].width * dpr
20 canvas.height = res[0].height * dpr
21 ctx.scale(dpr, dpr)
22
23 // 开始绘图...
24 this.ctx = ctx
25 this.canvas = canvas
26 })
27 }
28})
29
30// 📐 Canvas 坐标系
31// 原点(0,0)在左上角
32// x轴向右增大,y轴向下增大
33// 单位为逻辑像素(px)
34// 需要乘以 dpr 适配高清屏
新版 Canvas 使用 type="2d" 和 id 属性。在 onReady 生命周期中通过 createSelectorQuery 获取 canvas 节点,再调用 getContext('2d') 获取绘图上下文。重要步骤:获取设备像素比 dpr,将画布实际尺寸乘以 dpr 并 scale,否则在高清屏上会模糊。Canvas 坐标系原点在左上角,x 轴向右,y 轴向下。
Canvas绘图API
canvas-draw.js
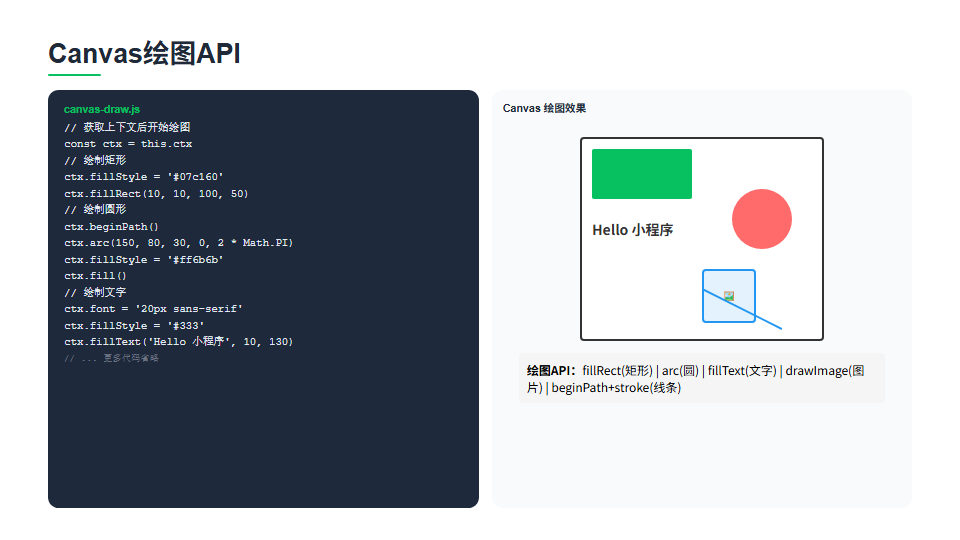
Canvas 绘图效果
1// 获取上下文后开始绘图
2const ctx = this.ctx
3
4// 绘制矩形
5ctx.fillStyle = '#07c160'
6ctx.fillRect(10, 10, 100, 50)
7
8// 绘制圆形
9ctx.beginPath()
10ctx.arc(150, 80, 30, 0, 2 * Math.PI)
11ctx.fillStyle = '#ff6b6b'
12ctx.fill()
13
14// 绘制文字
15ctx.font = '20px sans-serif'
16ctx.fillStyle = '#333'
17ctx.fillText('Hello 小程序', 10, 130)
18
19// 绘制图片
20const img = canvas.createImage()
21img.src = 'https://example.com/logo.png'
22img.onload = () => {
23 ctx.drawImage(img, 10, 150, 80, 80)
24}
25
26// 绘制线条/路径
27ctx.beginPath()
28ctx.moveTo(120, 150)
29ctx.lineTo(200, 200)
30ctx.strokeStyle = '#2196f3'
31ctx.lineWidth = 2
32ctx.stroke()
33
34// 保存为图片
35wx.canvasToTempFilePath({
36 canvas: canvas,
37 success(res) {
38 const tempFilePath = res.tempFilePath
39 // 可保存到相册或上传
40 }
41})
Canvas 绘图核心 API:fillRect 绘制填充矩形,参数为 x、y、宽、高;arc 绘制圆弧,参数为圆心x、y、半径、起始角、结束角,画完整圆用 2 * Math.PI;fillText 绘制文字,需先设置 font 和 fillStyle;drawImage 绘制图片,需先通过 createImage 加载;beginPath + moveTo + lineTo + stroke 绘制线条。绘制完成后用 canvasToTempFilePath 导出为图片。
案例4-3头像上传+案例4-4模拟时钟
upload-avatar.js
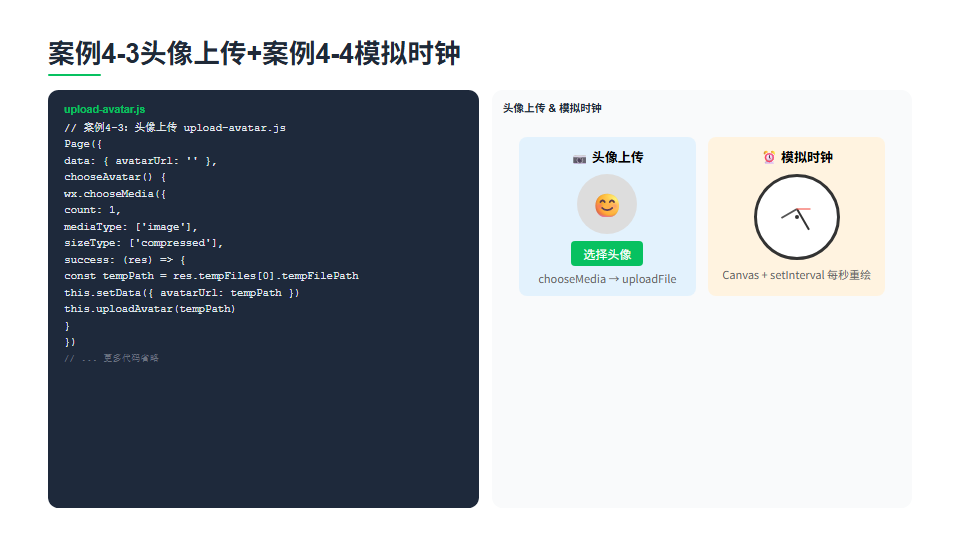
头像上传 & 模拟时钟
1// 案例4-3:头像上传 upload-avatar.js
2Page({
3 data: { avatarUrl: '' },
4
5 chooseAvatar() {
6 wx.chooseMedia({
7 count: 1,
8 mediaType: ['image'],
9 sizeType: ['compressed'],
10 success: (res) => {
11 const tempPath = res.tempFiles[0].tempFilePath
12 this.setData({ avatarUrl: tempPath })
13 this.uploadAvatar(tempPath)
14 }
15 })
16 },
17
18 uploadAvatar(filePath) {
19 wx.uploadFile({
20 url: 'https://api.example.com/upload/avatar',
21 filePath: filePath,
22 name: 'avatar',
23 success(res) {
24 const data = JSON.parse(res.data)
25 wx.showToast({ title: '上传成功' })
26 }
27 })
28 }
29})
30
31// 案例4-4:模拟时钟 clock.js
32Page({
33 async onReady() {
34 const query = wx.createSelectorQuery()
35 query.select('#clockCanvas')
36 .fields({ node: true, size: true })
37 .exec((res) => {
38 const canvas = res[0].node
39 const ctx = canvas.getContext('2d')
40 const dpr = wx.getSystemInfoSync().pixelRatio
41 canvas.width = res[0].width * dpr
42 canvas.height = res[0].height * dpr
43 ctx.scale(dpr, dpr)
44
45 // 定时绘制时钟
46 this.timer = setInterval(() => {
47 this.drawClock(ctx, 150)
48 }, 1000)
49 })
50 },
51
52 drawClock(ctx, r) {
53 ctx.clearRect(0, 0, 300, 300)
54 const now = new Date()
55 const h = now.getHours() % 12
56 const m = now.getMinutes()
57 const s = now.getSeconds()
58 // 绘制表盘、刻度、指针...
59 this.drawDial(ctx, r) // 表盘
60 this.drawHand(ctx, r, h*30+m*0.5, r*0.5, 6) // 时针
61 this.drawHand(ctx, r, m*6, r*0.7, 4) // 分针
62 this.drawHand(ctx, r, s*6, r*0.85, 2) // 秒针
63 },
64
65 onUnload() { clearInterval(this.timer) }
66})
案例4-3头像上传:用 chooseMedia 选择图片,获取临时路径后 setData 更新显示,再调用 uploadFile 上传到服务器。案例4-4模拟时钟:在 onReady 中获取 Canvas 上下文,用 setInterval 每秒重绘:先 clearRect 清空画布,再根据当前时间计算时针、分针、秒针角度,用 beginPath + moveTo + lineTo + stroke 绘制指针。页面卸载时 clearInterval 清除定时器。
6
课堂视频
第10次课 · 文件操作与Canvas绘图
本次课教学视频请在课堂现场观看
视频文件较大未随本站发布;如需回看,请向任课教师索取或在课程群下载。
7
教材案例源码
用微信开发者工具「导入项目」打开对应目录即可运行。知识储备是分知识点的最小示例,案例实现/项目实现是完整工程,服务器端是案例配套的后端接口服务。
8
课后实践
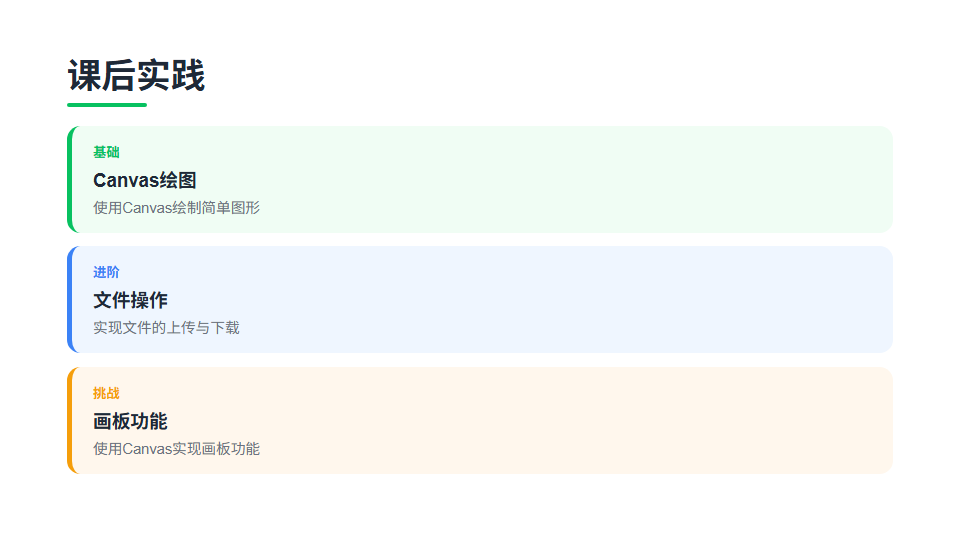
基础
完成头像上传下载
按照案例4-3,实现头像选择、上传、下载的完整流程
进阶
完成模拟时钟
按照案例4-4,使用Canvas 2D绘制模拟时钟,实现实时走针效果
挑战
Canvas画板
实现一个Canvas画板,支持手指绘制、颜色选择、线宽调节、清除画布、保存图片
9
本课小结
文件操作API
Canvas组件使用
Canvas绘图API
案例4-3头像上传+案例4-4模拟时钟